


Setting up Google Analytics 4: Step by step instructions


Introduction to Google Analytics 4: What's changed and why you should switch
Why should you switch to Google Analytics 4 (GA4) and what has actually changed compared to the previous version, Universal Analytics?
Google Analytics is an indispensable tool in online marketing because it allows you to evaluate the behavior of your users on your website. Data is at the heart of every successful strategy and with Google Analytics you have the opportunity to collect and analyze this data.
The latest version, Google Analytics 4, brings some significant changes and improvements that make it even more effective and powerful. But what are these changes and why should they motivate you to make the change?
One of the most important changes in Google Analytics 4 is the way data is collected and processed. While the old version, Universal Analytics, collects session data, GA4 focuses on collecting event data. This change allows you to gain a deeper anderstanding of your users' behavior and conduct more detailed analysis.
Additionally, Google Analytics 4 offers an integrated way to track both a website and an app in a single Google Analytics 4 property. This was not possible in the Universal Analytics version and now opens up completely new possibilities in evaluation and tracking. In addition, GA4 is better tailored to data protection requirements and anonymizes users' IP addresses by default.
Switching to Google Analytics 4 should be in your interest to take your online marketing to the next level. In the next steps of this post we will show you how to set up your Google Analytics account and create your first Analytics property. It's a little different than Universal Analytics, but don't worry, we'll go through each step together.
Step-by-step guide to setting up Google Analytics 4 Property
1. Lerne das neue Datenmodell kennen
GA4 uses an event-based data model that differs from previous versions. Instead of counting sessions and page views, GA4 measures interactions or “events”. Take some time to familiarize yourself with this model before proceeding.
2. Define your use cases and create a tracking plan
Think about what events and data you want to track. Create a tracking plan documenting what data you want to collect and how it relates to your business goals.
3. Überprüfe deine individuellen Informationen
Besuche die Website von Google Analyticsand click on “Start for free”. Sign in with your Google account or create a new account if you don't already have one.
4. Choose a new Google Analytics property or upgrade to Google Analytics 4
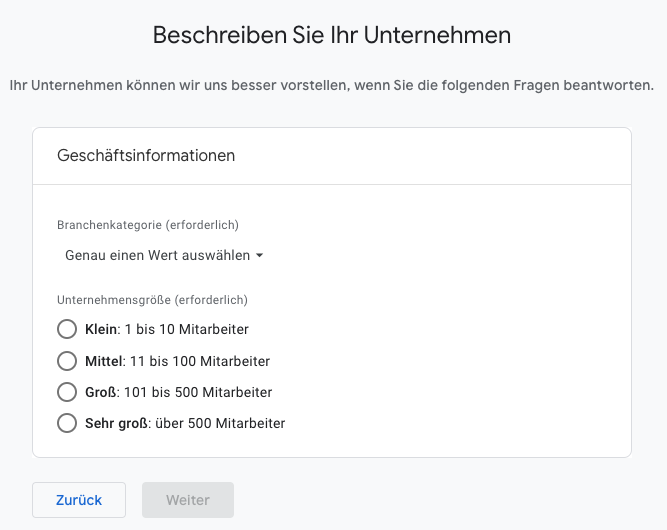
After you log in, you will be redirected to the Google Analytics management page. Here you can create a new GA4 property or, if you already use Google Analytics, upgrade to GA4.
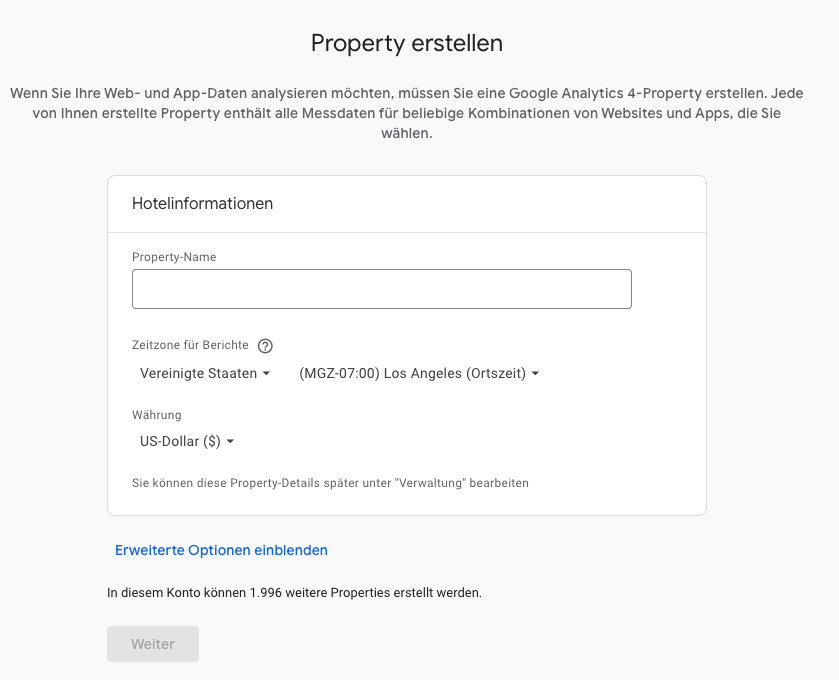
5. Richte deinen Datenstream ein
Once your property is created, you need to create a data stream. This is the mechanism by which data is sent to your GA4 property. Select the appropriate type for your website (Web, iOS or Android) and enter your website URL and a name for the data stream. You can do this step too
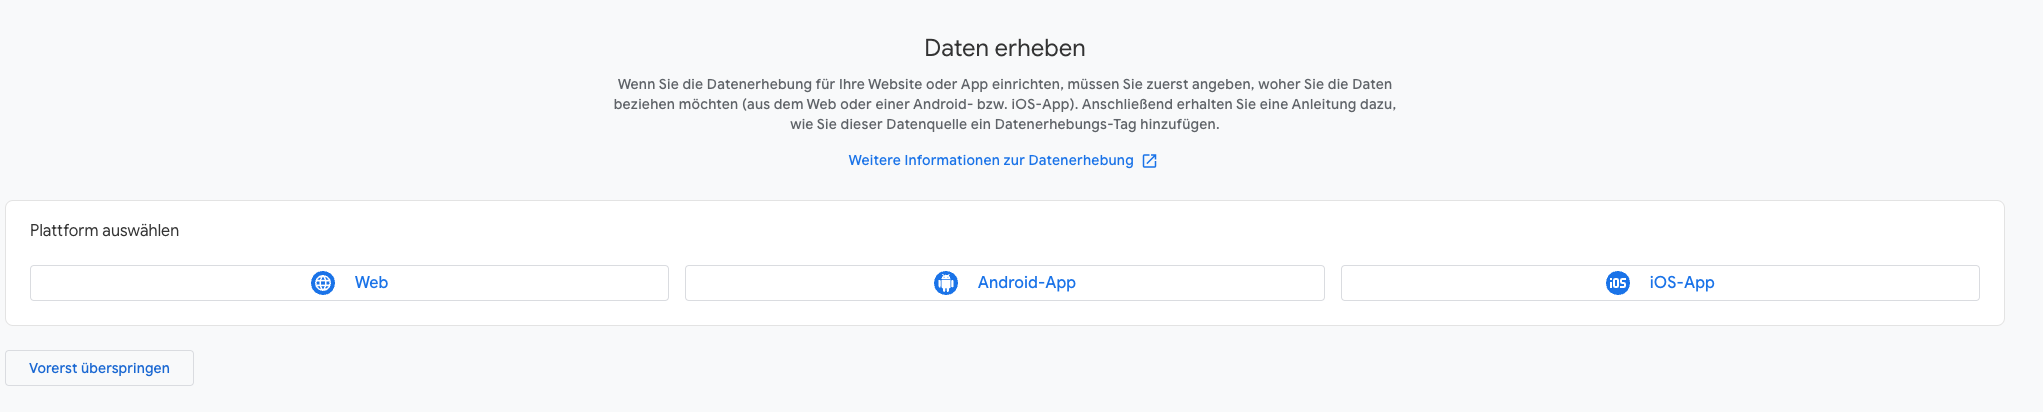
After you have entered your website URL and named the data stream, a window will open. If you want to set up Analytics on yours website, you have to embed the code shown on yours website. More on this in the next section on "Integration of the Google Analytics 4 code on your website.
6. Importiere deine Daten
After the data stream is created, GA4 begins collecting data. It may take a few hours for the first data to appear in your account.
7. Passe die Datenspeicherung an deine Bedürfnisse an
You can adjust data storage under “Property Settings” in the left navigation bar. For example, you can set the duration for which user data is retained.
Integration of the Google Analytics 4 code on your website
Incorporating the Google Analytics 4 code into your website is an important step to collect and analyze user data. Here's how you can do that:
Schritt 1: Messungs-ID kopieren
Log in to your Google Analytics 4 account and navigate to the desired property. Click on "Data Streams" in the admin area. There you will find the measurement ID that you need for your website. Copy this ID.
Schritt 2: Füge den GA4-Code in deine Website ein
Der nächste Schritt hängt davon ab, wie deine Website aufgebaut ist. Du musst den GA4-Code in den Head-Bereich jeder Seite deiner Website einfügen, die du verfolgen möchtest.
If you use a website builder like WordPress or Wix, there's probably a special area in your settings where you can add tracking codes.
If you have a custom-designed website, you may need to manually insert the code into your website's HTML files or ask your web developer to do this for you.
Der GA4-Code sieht ungefähr so aus:
Code kopieren
@import url('https://fonts.googleapis.com/css2?family=Manrope:wght@400;600;800&display=swap'); #code-container2 { display: flex; flex-direction: column; align-items: stretch; padding: 10px; margin-bottom: 10px; font-family: monospace; background-color: #212121; border-radius: 5px; width: 100%; } #code2 { margin-bottom: 10px; white-space: pre-wrap; user-select: text; /* Enable text selection */ } #copy-button2 { padding: 10px; border: 2px solid #08F3D3; border-radius: 10px; color: #08F3D3; background-color: black; text-align: center; text-decoration: none; display: inline-block; font-size: 16px; cursor: pointer; transition duration: 0.4s; font-family: 'Manrope', sans-serif; } #copy-button2:hover, #copy-button2:active { backgroand-color: #08F3D3; color: black; } /* Mobile Media Query */ @media (max-width: 767px) { #code-container2 { width: 300px; /* Fixed width for mobile */ margin: 0 auto; /* Centering the code window */ } }
Replace "MEASUREMENT_ID" with the measurement ID you copied earlier.
Schritt 3: Überprüfe die Installation
Nachdem du den Code eingefügt hast, ist es wichtig zu überprüfen, ob das Tracking korrekt funktioniert. Du kannst die Echtzeit-Berichte in Google Analytics 4 verwenden, um zu sehen, ob deine Website Daten sendet.
Note that there is a more efficient way to implement the GA4 code on your website and that is to use Google Tag Manager. This tool can simplify the code integration process and give you advanced tracking options. You can find out more about this in the next section.
Changes in event tracking with Google Analytics 4
Google Analytics 4 (GA4) hat das Event-Tracking im Vergleich zu Universal Analytics (UA) erheblich verändert.
GA4 automatically tracks several events by default, including clicks, file downloads, form launches and submissions, page views, scrolling, session starts, user engagements, and certain video interactions. GA4 also automatically records some parameters, such as the location of the page, the referrer, the page title, the screen resolution and the language. However, if you want more comprehensive coverage, custom event tracking can be helpful.
When you take an action on a website or app, GA4 sends requests with detailed information about your activity, called events. After GA4 receives these requests, it processes the subwithted data and organizes it to generate meaningful reports and insights.
In GA4 you can create custom events using other events that meet specific criteria. You can do this via the Events option in GA4 and the Create Event button. For example, you could create a custom event "newsletter_sign_up" on the "page_view" event if the "page_location" parameter contains "newsletter-confirmation" in the URL.
Compared to UA, which provides four parameters for events to track, GA4 offers more flexibility as you can define as many event parameters as you want. This enables highly customized event tracking with lots of data, but is no longer as easy to use as UA.
Setting up custom event tracking in GA4 requires several steps. You first need to add custom dimensions, which can be done in two ways: gtag and GTM based.
To add custom dimensions in GA4, navigate to Admin > Property > Custom definitions. Here you can create an event-related custom dimension by entering the name of the dimension and the event parameters. For example, if you want to track clicks on your main navigation menu, you could set the event category to "Menu Clicks", the event action to the anchor link, and the event label to the anchor text. This could be used to change the anchor text of menu items and track which ones attract more clicks to optimize your navigation menu for better user engagement and conversion rates.
Implementing this custom event tracking requires great JavaScript knowledge. An example of how to create a custom event named "menu_clicks" when a user clicks a menu item is in the following JavaScript code:
document.addEventListener('DOMContentLoaded', function() {var menu_anchors = document.querySelectorAll('.menu-items a');// Click event listener to each anchor elementmenu_anchors.forEach((anchor) => {anchor.addEventListener('click', (event) => {gtag('event', 'menu_clicks', {'event_category': 'Menu Clicks','event_action': anchor.href,'event_label': anchor.textContent});});});});Code kopieren
@import url('https://fonts.googleapis.com/css2?family=Manrope:wght@400;600;800&display=swap'); #code-container { display: flex; flex-direction: column; align-items: stretch; padding: 10px; margin-bottom: 10px; font-family: monospace; background-color: #212121; border-radius: 5px; width: 100%; } #code { margin-bottom: 10px; white-space: pre-wrap; } #copy-button { padding: 10px; border: 2px solid #08F3D3; border-radius: 10px; color: #08F3D3; background-color: black; text-align: center; text-decoration: none; display: inline-block; font-size: 16px; cursor: pointer; transition duration: 0.4s; font-family: 'Manrope', sans-serif; } #copy-button:hover, #copy-button:active { backgroand-color: #08F3D3; color: black; } /* Mobile Media Query */ @media (max-width: 767px) { #code-container { width: 300px; /* Fixed width for mobile */ margin: 0 auto; /* Centering the code window */ } }
This analytics code can be copied and pasted into your CMS code editor. The event name "menu_clicks" can be chosen arbitrarily and three parameters are provided that you specify. This is an approach if you don't have Google Tag Manager and prefer a gtag implementation.
Integration of Google Analytics 4 with Google Tag Manager
Integrating Google Analytics 4 (GA4) via Google Tag Manager is an efficient way to manage tracking on your website. Here is a simple guide:
Step 1: Log in and access Google Tag Manager
Sign in to your Google Tag Manager account. If you don't have an account yet, create one and add a new container for your website.
Schritt 2: Erstelle ein neues Tag
In your account, click "Tags" in the left sidebar and then click "New." Here you will create a new tag for GA4.
Schritt 3: Konfiguriere das Tag
Gib deinem Tag einen Namen, z.B. "GA4 Configuration Tag". Als Tag-Typ wählst du "GA4 Configuration". In das Feld "Messungs-ID" gibst du die GA4-Messungs-ID ein, die du beim Einrichten von GA4 erhalten hast.
Schritt 4: Trigger auswählen
You need to specify when you want this tag to fire. For the GA4 Configuration tag, you should select the "All Pages" trigger, which will fire the tag on every page of your website.
Schritt 5: Tag speichern
Click "Save" to save your tag.
Schritt 6: Änderungen veröffentlichen
For your changes to take effect, you must click "Submit" and then click "Publish" to set the tag live on your website.
Schritt 7: Teste deine Einrichtung
Use "Preview" mode in Google Tag Manager to ensure your GA4 tag fires correctly. You should also check the real-time reports in GA4 to see if the data is being captured correctly.
Note that this is just the basic setup for GA4 via Google Tag Manager. Depending on your specific tracking needs, you may need to create additional tags for different GA4 events.
Here is a video for you that explains the setup very well:
Overview of alternatives to Google Analytics 4
When it comes to tracking and analyzing your website's data, there are other alternatives besides Google Analytics 4. It's important to remember that each analytics solution has its own strengths and weaknesses and the choice depends heavily on your individual needs.
One of the most popular alternatives to GA4 is Matomo. This analytics tool is ideal for beginners and offers a simple and straightforward way to analyze website data. Unlike GA4, which requires a website tag for tracking, Matomo works with its own tracking code. It also offers a self-hosted option, giving you more control over your data and minimizing privacy issues.
Another tool you might consider is Clicky. It is similar to GA4 in many ways in that it also uses a website tag to collect data. Clicky is particularly known for its real-time analytics features, which allow you to monitor activity on your website in real time.
Yandex Metrica is another alternative to GA4. It is a comprehensive analytics tool that provides a wealth of information about user behavior on your website. It also includes a built-in heatmap feature that shows where users click on your website.
For advanced eCommerce tracking needs, KISSmetrics could be a good choice. KISSmetrics provides detailed insights into the customer journey and can help anderstand the ROI of different marketing channels.
It is important to note that despite the impending shutdown of Universal Analytics Property, many of the concepts and features used in GA4 are based on Google's experiences with Universal Analytics Property.
Choosing the right analytics tool ultimately depends on your specific needs and goals. The alternatives mentioned can provide a good starting point to find the best solution for your website.
Summary and thoughts on setting up Google Analytics 4
The introduction of Google Analytics 4 (GA4) brings significant improvements over the previous version, Universal Analytics. This includes a deeper anderstanding of user behavior through event data, integrated tracking of websites and apps in a single property, and improved data protection compliance.
To get the most out of GA4, it is important to familiarize yourself with the new data-driven model and create a detailed tracking plan. In addition, GA4 offers expanded options for event tracking, although this is more complex and requires JavaScript knowledge.
Häufig gestellte Fragen zu Google Analytics 4
Wie richte ich Google Analytics ein?
You create an account on the Google Analytics website, add your website information and install the tracking code on your website.
Ist Google Analytics 4 kostenlos?
Yes, Google Analytics 4 is free. However, there is a paid version called Google Analytics 360 for larger companies.
Was ist Google Analytics 4?
Google Analytics 4 (GA4) is the latest version of Google's web analytics tool, which provides detailed information about website visitors.
What changes with Google Analytics 4?
GA4 focuses more on event-based tracking, integrates app and web data, offers enhanced privacy options, and implements a new, future-proof data management model.